
Similar Posts
A TALE OF TRANSFORMATION
Two New Mosaics for St George’s Orthodox Church, Houston, Texas
Aidan Hart
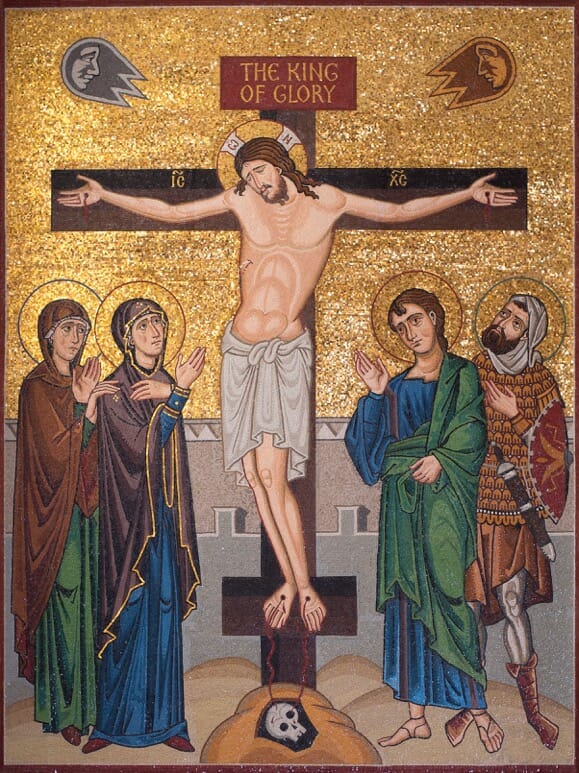
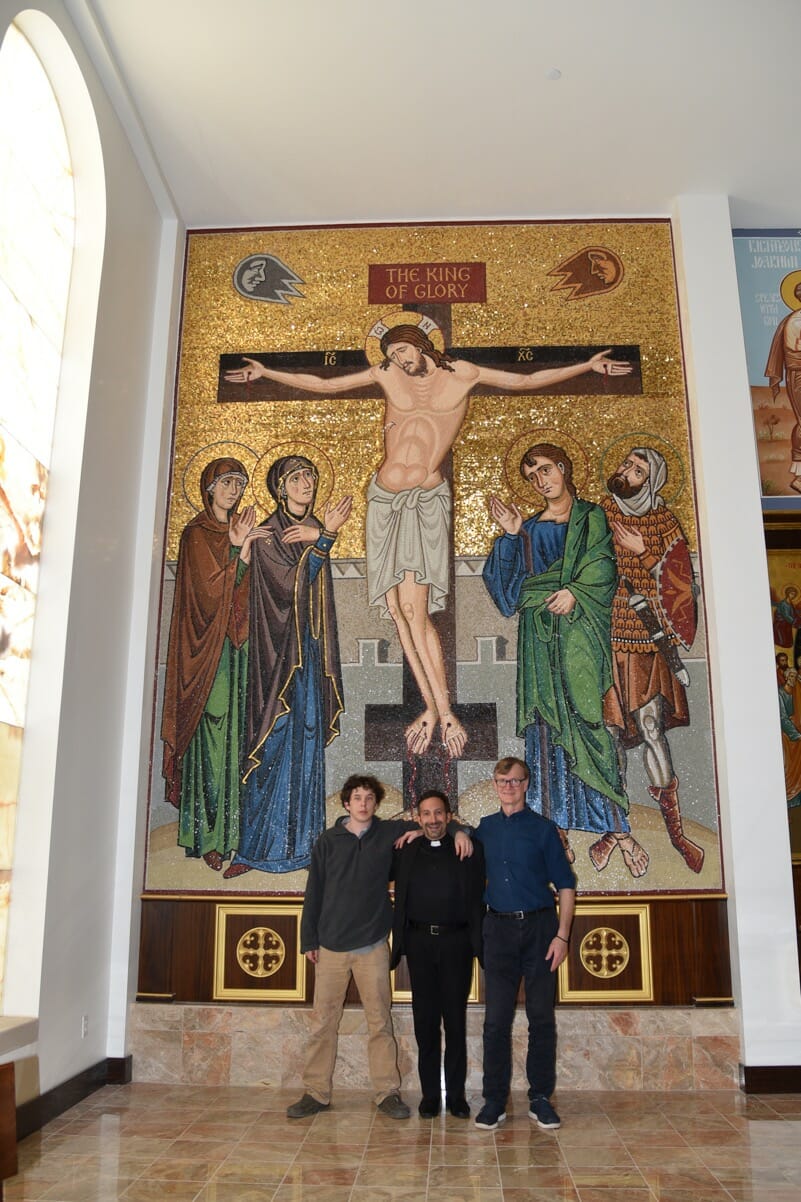
Crucifixion mosaic, Houston, Texas
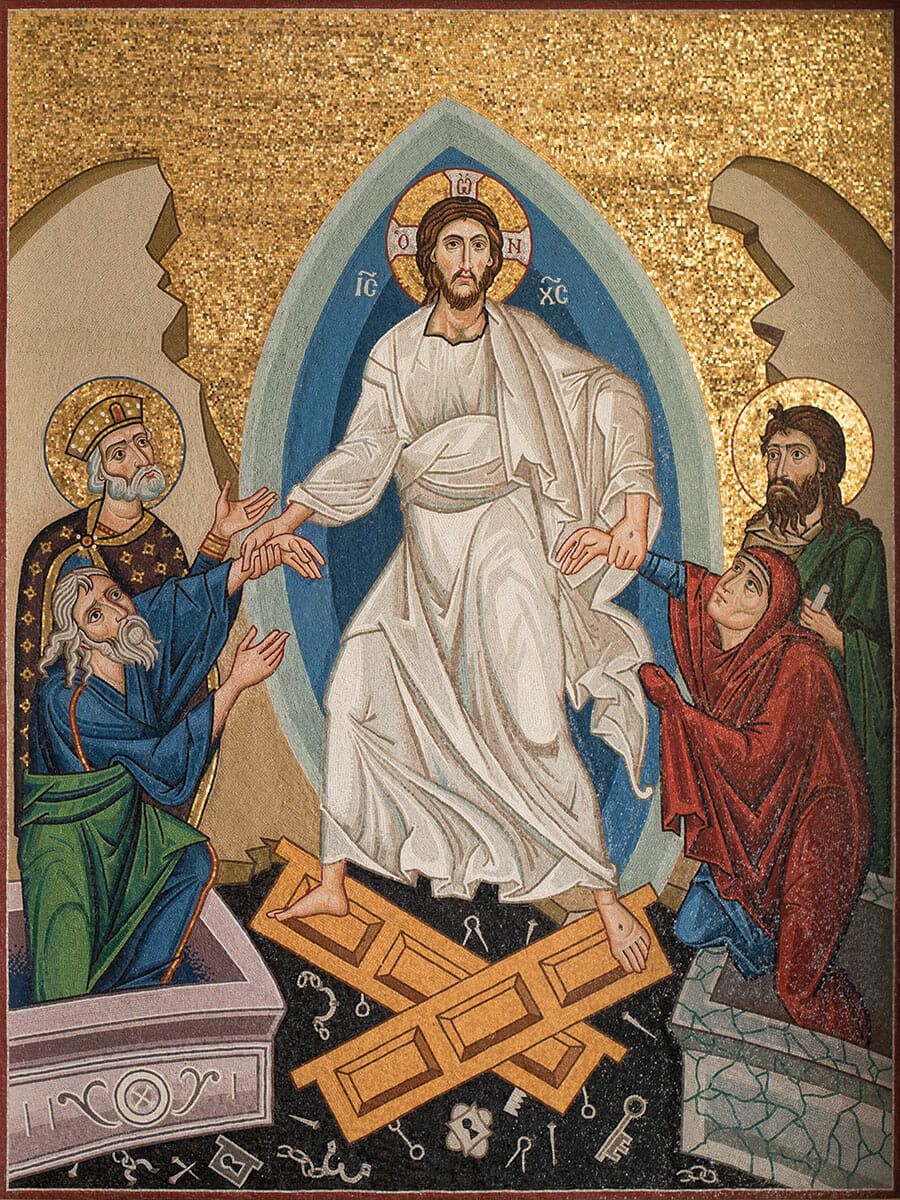
Resurrection mosaic, Houston, Texas (1)
This is the story of how two large mosaics for St George’s Orthodox Church in Houston Texas came to completion this January. The genesis of a mosaic is a tale of transformation, from sand to glass, to image, to radiant raiment for the transfigured Body of Christ.
Why raiment? Liturgical art is part of the Holy Spirit’s on-going work to gather up the fragmented world and incorporate it into the living Body of Christ, the Church. And this Pentecostal harvesting includes the inanimate material world, for the Evangelists tell us that when Christ was transfigured His garments shone with divine light together with His face.
This is a story where many elements are gathered together to compose a hymn of praise: raw matter; modern technology; vision; the generosity of donors; patience; inspiration and lessons from the past. Even imperfections and mistakes will have their place.
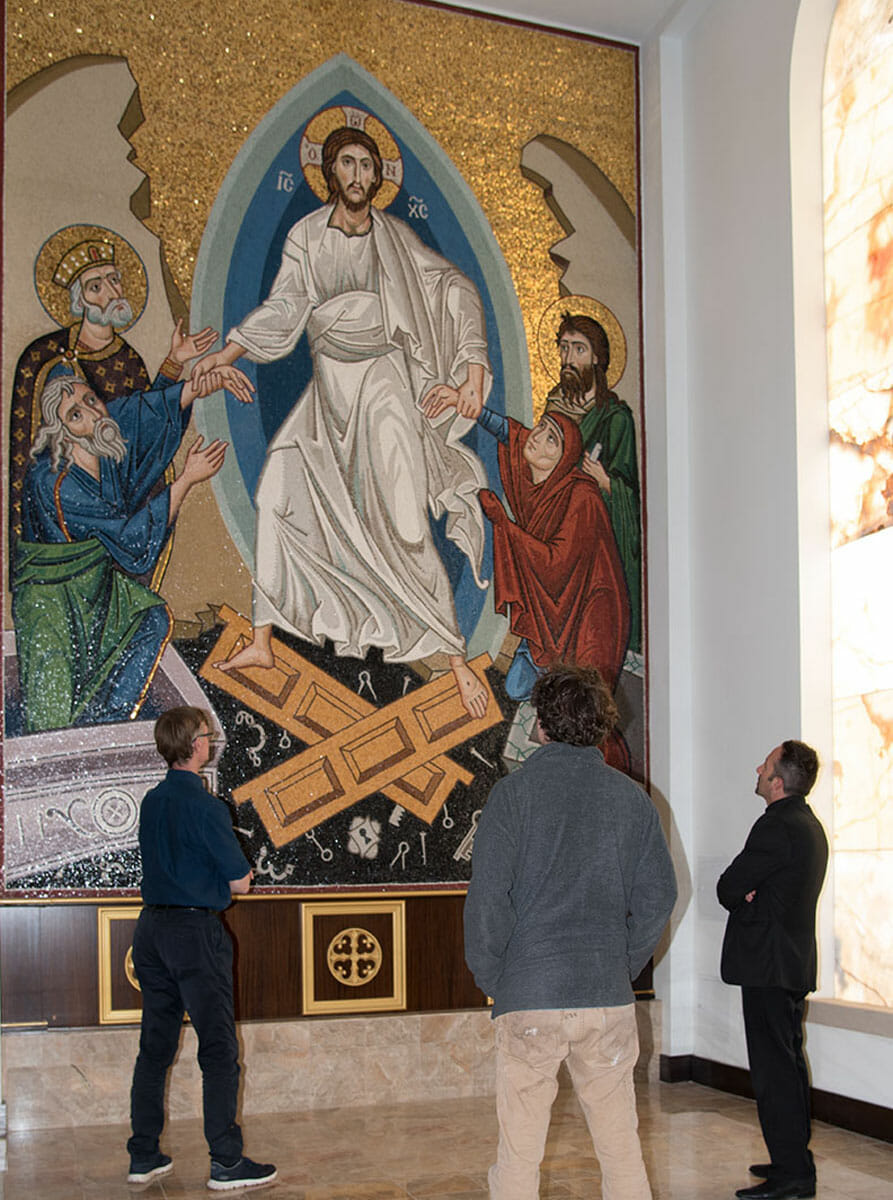
Resurrection mosaic
The stuff
A bulldozer scoops up sand. The sand is mixed with soda ash and limestone and then heated to an incredible 1700° C (3090° F) to make glass.
In an old family run workshop in Venice, Orsoni, this glass is re-melted and metal oxides are added for colour.
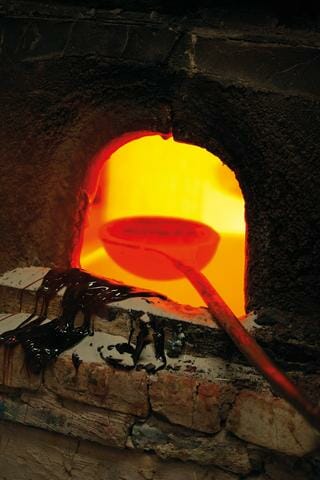
Remelting glass with oxides added for colour
The glutinous material is poured onto a slab and squashed, to make a sort of glass pancake, called a “pizza”. This is then cut by hand into the small pieces, called tesserae, that make up mosaics.
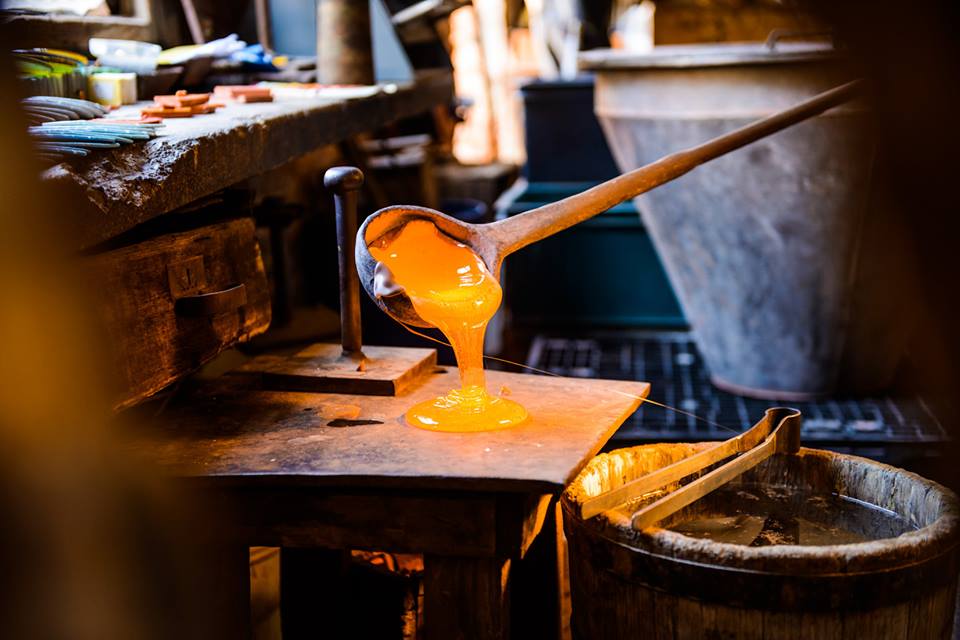
Making a smalti pizza. Orsoni
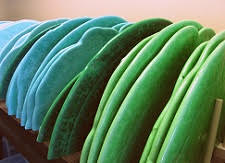
Glass pancakes ready to be cut.
Tesserae can be of this coloured glass, called smalti, or of stone. Tesserae are best cut by hand using a hammer and hardy, tools unchanged and un-bettered since Roman times.
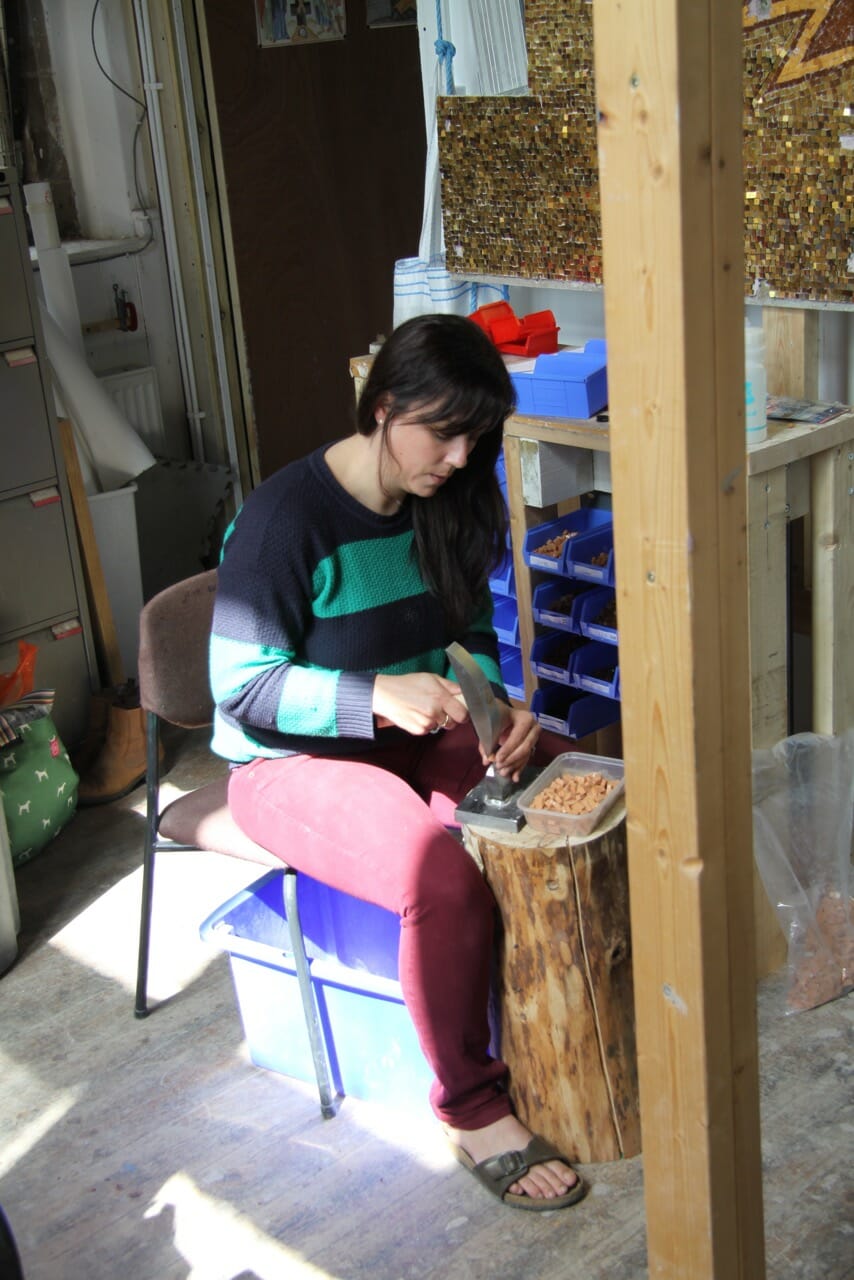
Victoria, an assistant, using a hammer and hardy.
The tesserae are ready. They lie in a box in Orsoni’s rooms, like pigments in an artist’s supply shop, waiting to be transformed like words into a poem, like musical notes into a symphony.
The vision
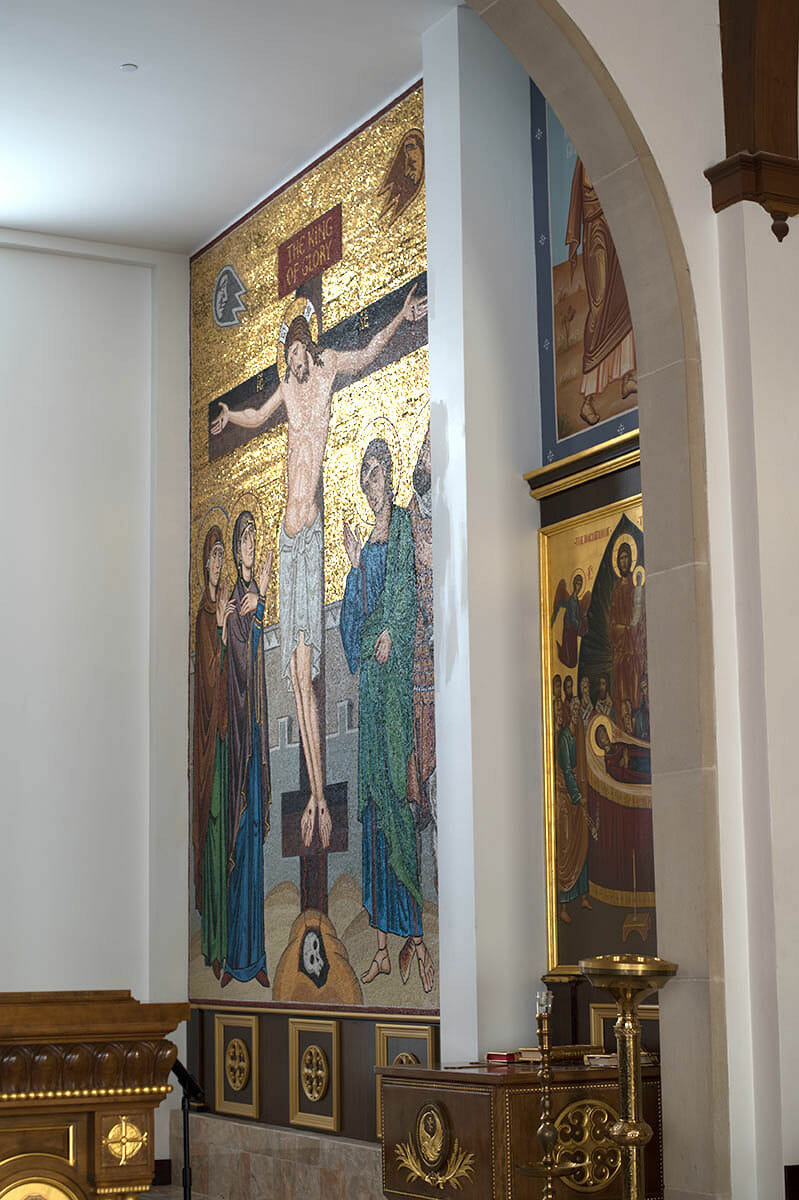
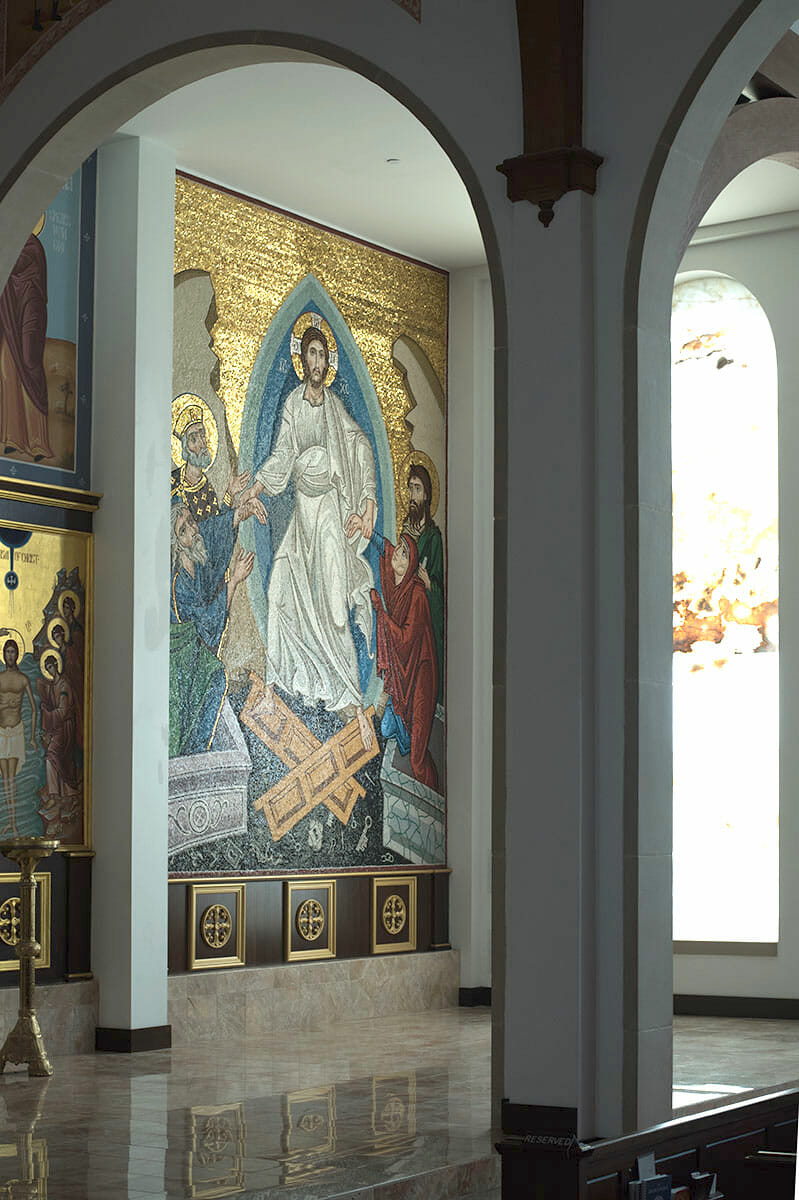
Meanwhile a priest in Houston, Father James Shadid, conceives the idea of commissioning two large mosaics to cover the new walls that his church’s extension will create, each to measure 3.6 x 4.8 metres (12 x 16 feet). He already sees the completed works in his mind’s eye, not in their totality, but in general form. The raw materials are ready, and so this idea is the next stage toward the completed mosaics that will, hopefully, shine forth something of Christ’s glory.
The word “idea” is derived from the Greek word idein, to see. The Holy Spirit opens the eye of someone’s heart to see something that both is and is yet to come. In Byzantine writings, it is therefore the originator and the donors who are called the makers – ktitores – and not the craft persons who fashion the final work. The craftspeople are humble servants who are happy to melt into the background when the work is complete – as long as they get more work in the future!
Father James searches the internet for someone to fulfil his vision. In this marvel of modern technology, radio waves shoot up into space carrying Father James’s request to view contemporary mosaics. The waves bounce around a few satellites and return to earth to find his answer in a vast computer bank, somewhere else on planet earth. Radio waves carry the answer back to him in the same way.
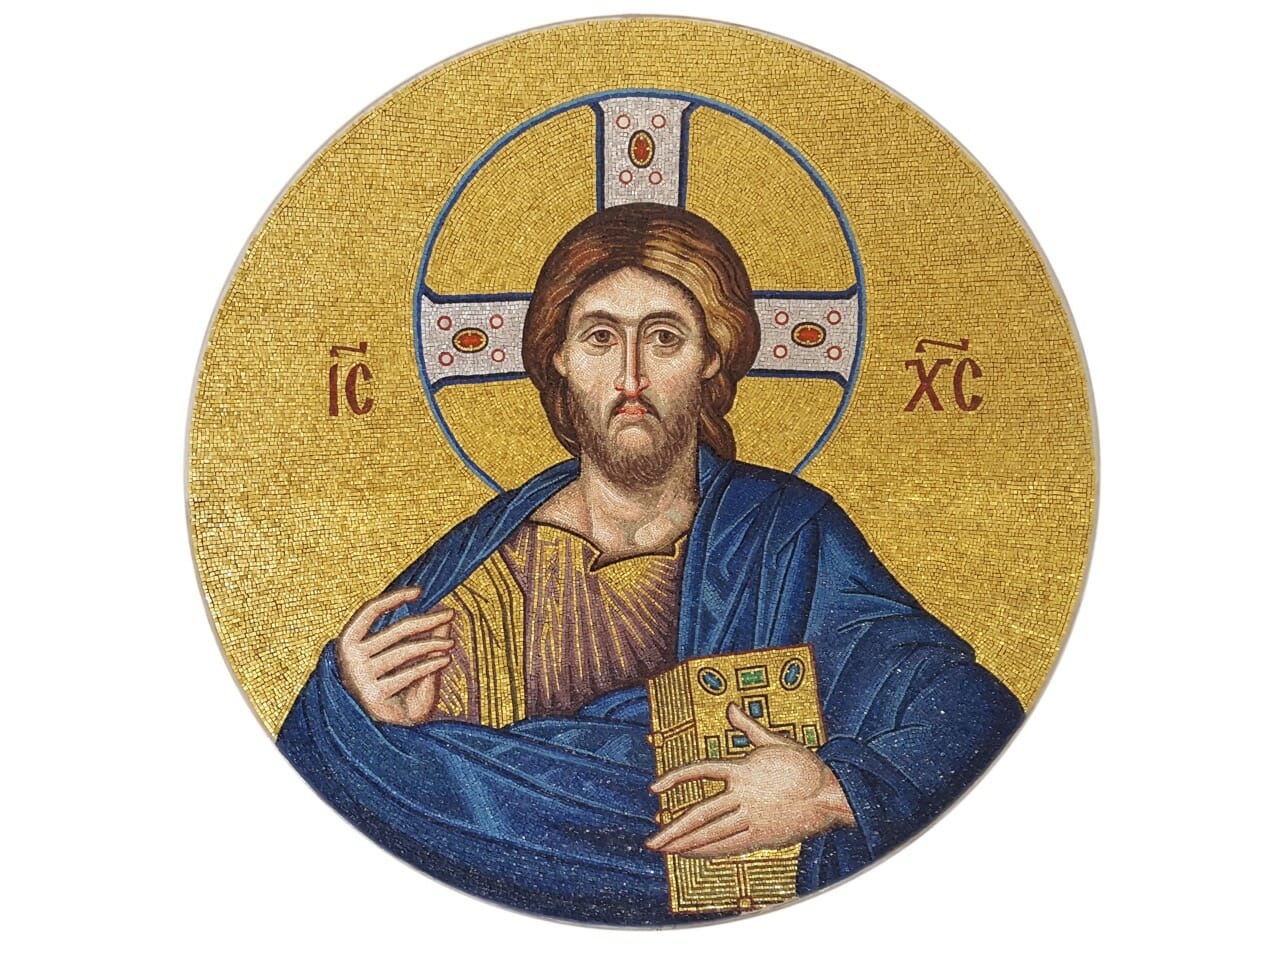
On his computer screen he eventually finds a mosaic image of Christ Pantocrator that draws his attention. It was recently completed by a mosaicist 7,500 km (4,700 miles) away, in the countryside of Shropshire UK. The mosaic has the spirit that he is looking for, so he decides he wants this person to make his church’s mosaics. So he emails its maker.
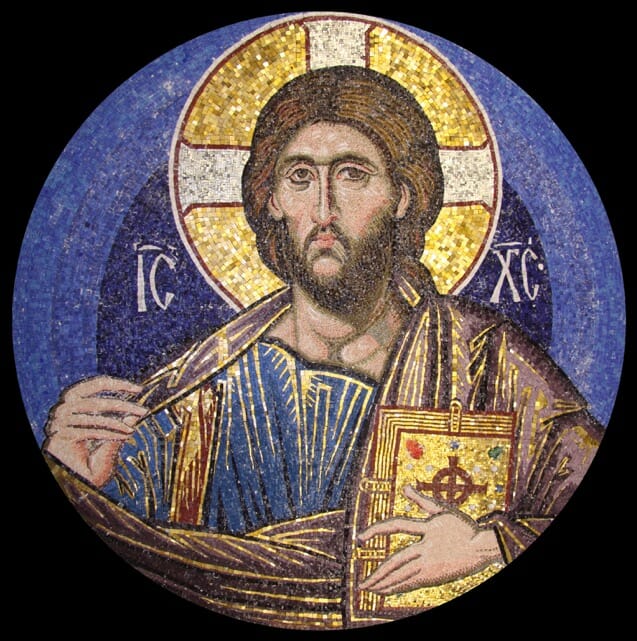
Pantocrator mosaic, Cardiff Wales.
The design
We correspond, and eventually I go to Houston to discuss details. The subjects are to be the Crucifixion and the Resurrection. They will stand to the north and south of the apse, around the Holy Table where all life in Christ both begins and culminates.
Father James would like the Resurrection to relate to the parish’s existing icon, so I make some preliminary drawings, adapting the icon’s design to fit the very different proportions of the new wall, and to suit the very different medium of mosaic. I then design the Crucifixion to harmonize with the Resurrection drawing.
No good thing comes without struggle, and eventually funds are raised, both from within the parish and from a generous donor. The next stage of work is ready to begin.
Full scale drawings are prepared. The smalti colours are chosen from Orsoni’s range, and the gold tesserae from nearby Donna Murano, situated on an island in the Venice basin. The smalti are taken out of the darkness of their boxes and sent to my little studio in Shrewsbury, UK.

Fullscale drawing
Principles and tricks of the trade
For many years I had been researching mosaics in Constantinople, Rome, Ravenna and Greece, to try and learn their secrets. I have also studied under the master mosaicist in Ravenna, Luciana Notturni. From all these sources I learned that there are principles common to all the medieval masterpieces. My assistant Martin Earle and I had tried to apply them to the mosaic of the Pantocrator we had recently made, and that had drawn Father James’s attention. But now these two much larger mosaics offered an even greater opportunity.
What are these principles?
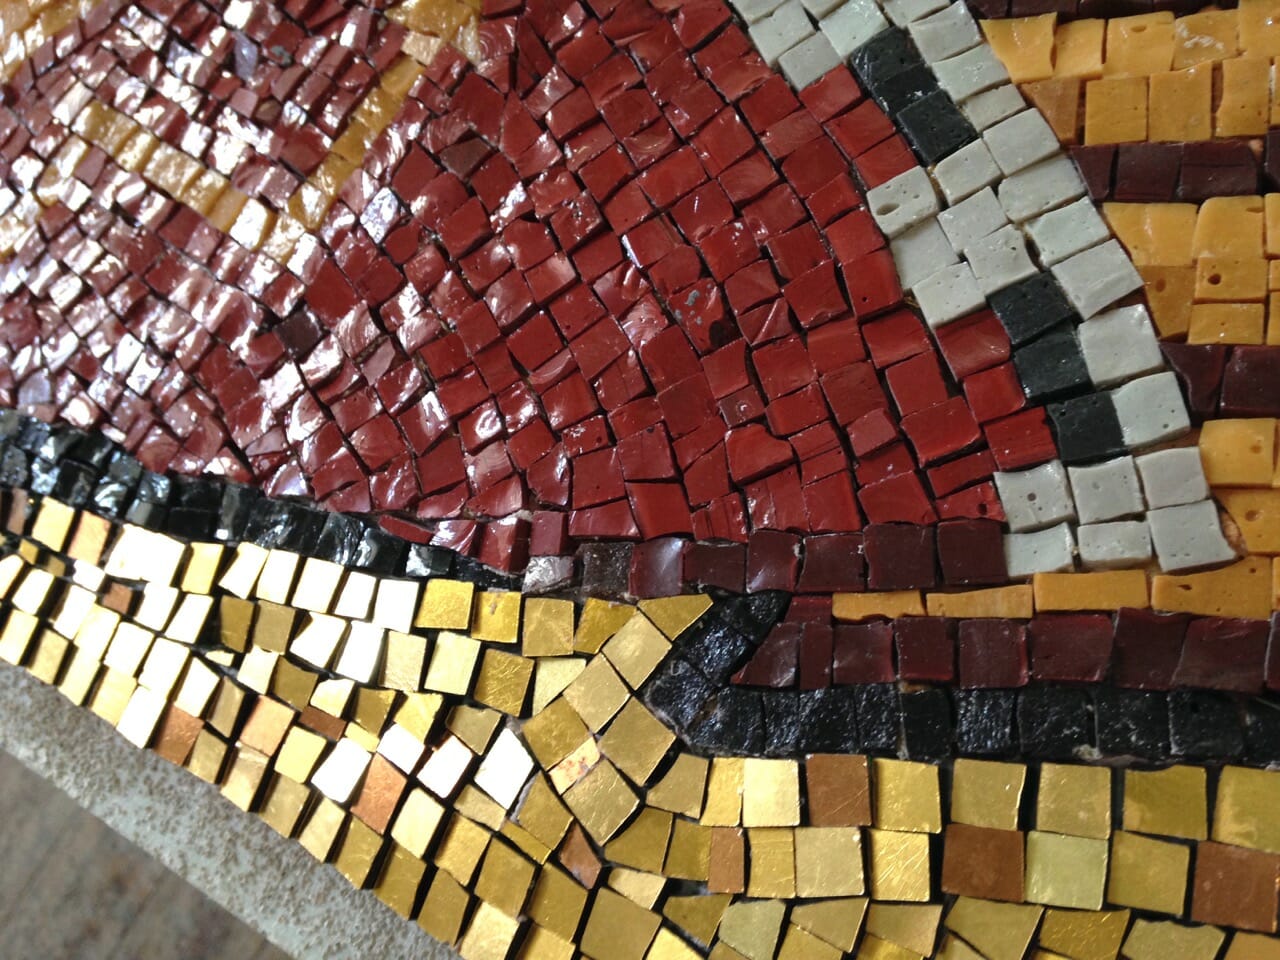
- Mosaics reflect light, so the tesserae, especially gold tesserae, must be set at angles that maximise the effect. For this reason the reverse technique where the surface is left completely flat is fine for floors and tables, but disaster for wall mosaics. The top of the Houston mosaics were to be 6.5. metres high, so we set a lot of the gold tesserae to slant downward by up to 30 degrees off the vertical. We also laid the coloured smalti at odd angles so they would play with the light.

Gold tesserae angled to reflect the maximum light, viewed from above
Angled smalti, to show the play of light

Our Cardiff mosaic had been for outside use, and therefore required grouting to stop frost destroying the work. In that exceptional case we had angled the tesserae somewhat less, but nevertheless enough to make the light dance. But since this Houston mosaic is for inside use, no grouting is required, so we incline the tesserae as much as aesthetics demand.
- The rhythm of each line of tesserae is critical. These lines are called andamenta in Italian (line, movement, walk). Even if all the tesserae were white, good andamenta will clearly reveal the subject. They are the mosaic’s equivalent of brush strokes, creating form in themselves apart from any colour modelling.

The andamenta, or lines of tesserae, emphasizing form
- It is no good trying to imitate a painting. Each medium has its strengths and limitations. A good artist will use the limitations of his or her medium to good effect, and not compel it to do something against its nature. The best mosaics therefore say a lot with little, leaving out secondary detail and making a feature of its pixilation. Where a painter uses glazes, a mosaicist must instead contrast neighbouring colours.
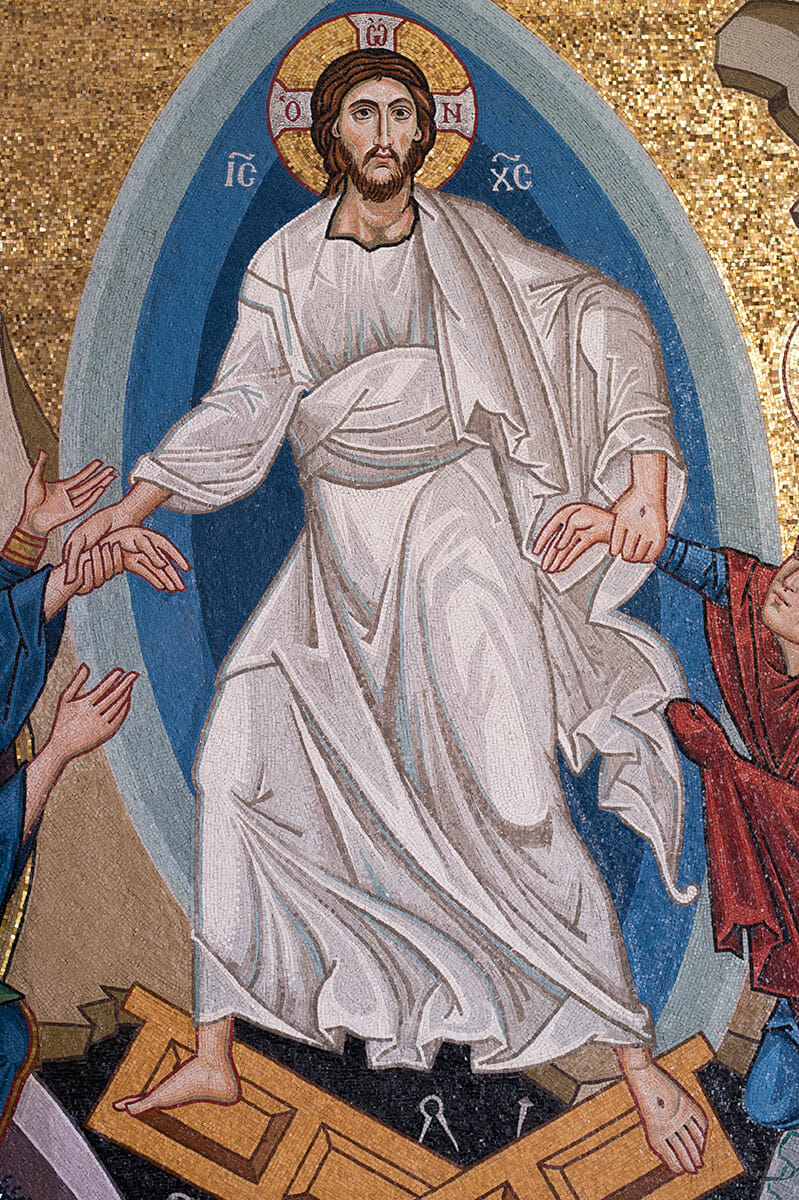
The resurrected Christ, showing simplified and emboldened modelling suitable for mosaic
- While not being garish in colour choice, for dramatic effect medieval mosaicists tended to use strong colours in selected places. Often, for example, one finds an andamenta of bright reds running down the side of a nose. This overstatement helps compensate for the big distances from which mosaics are usually viewed. Also, because so much light is reflected from a mosaic the eye’s iris contracts to admit less light to the retina. The mosaicist therefore needs to amplify critical lines to make them noticed.
Eve, showing strong lines, in red and black.
- Less is more. Due to technical limitations in manufacture, medieval mosaicists had a limited palette of smalti hues to work from. There was for example only one red smalti commonly available – an imperial red made from iron oxide. Stones had to be used for other reds. This technical limitation had the fortunate effect of helping mosaicists to keep chromatic unity. Today with new oxides available we are spoilt for choice, so one has to be particularly vigilant and self controlled when choosing a colour range.
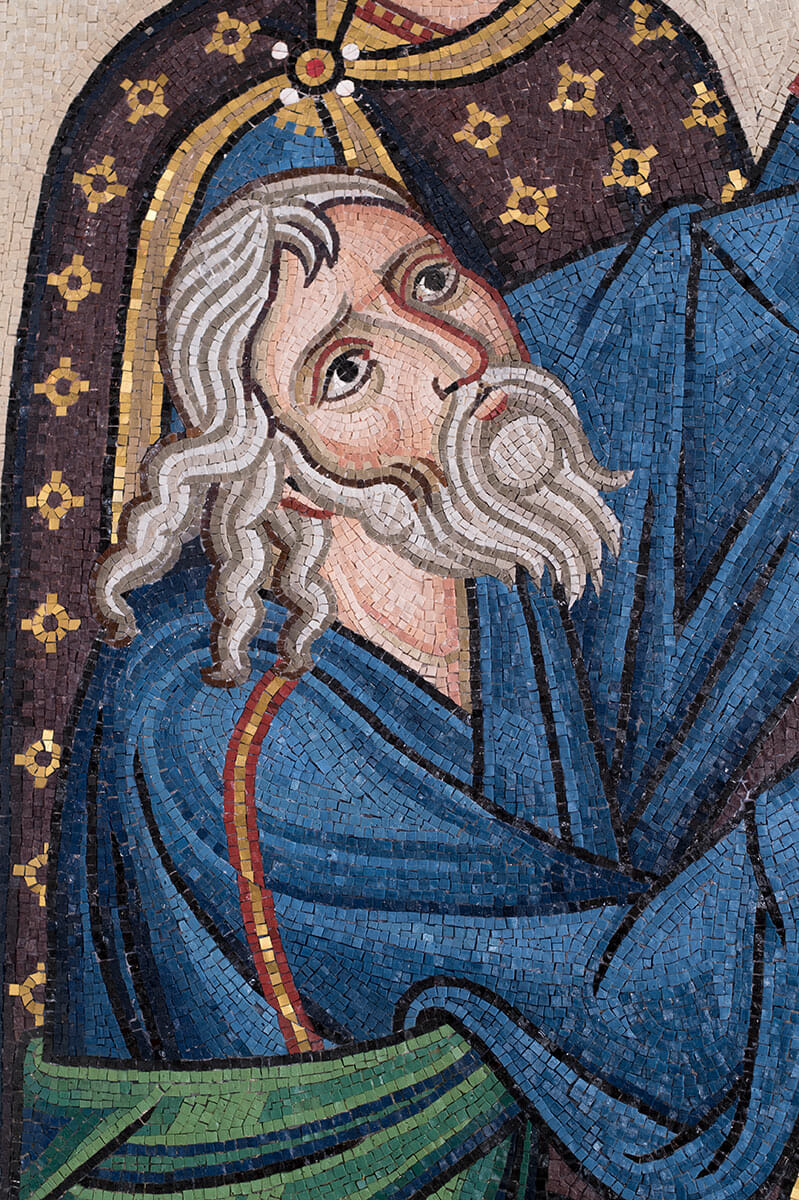
Adam, showing limited range of shades (usually three to four per colour).
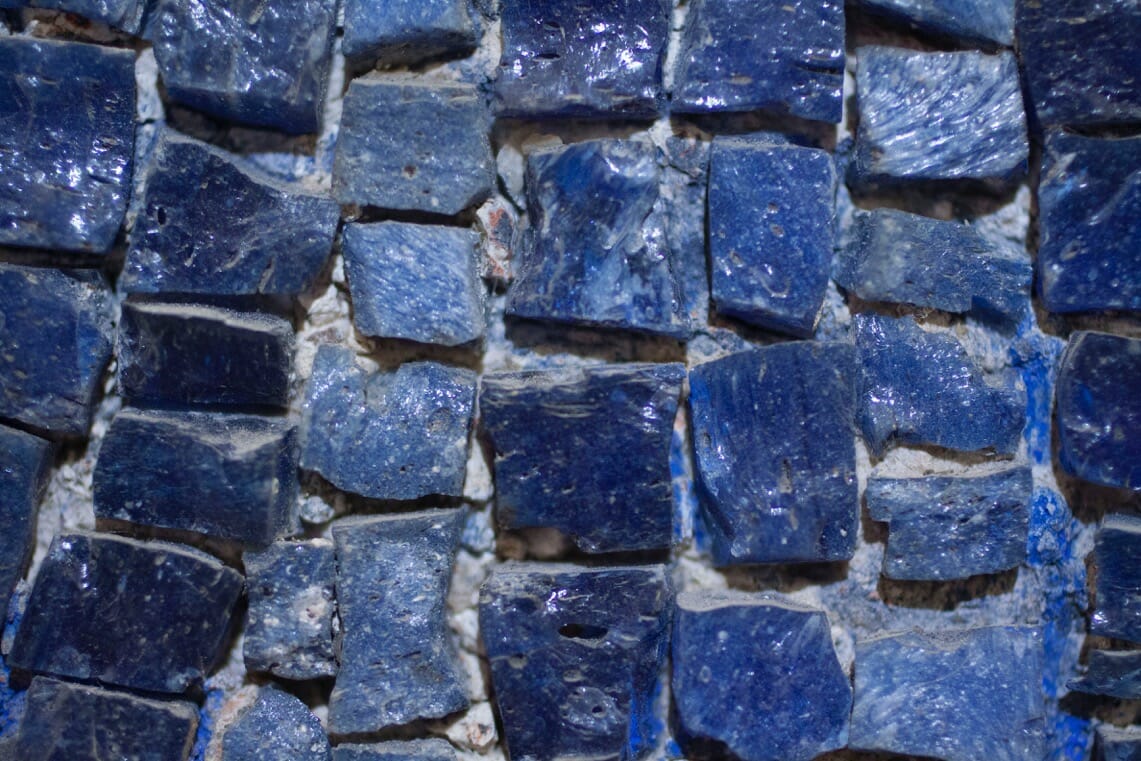
- There exists a perfect imperfection and an imperfect perfection. If one compares individual tesserae from medieval works with most of those produced today, one notices that the medieval smalti are less perfect. Each blue tessera from Ravenna, for example, might have three or more shades of blue. Being stirred by hand, the oxides were not been perfectly mixed. The mechanical mixers of today, however, do too good a job and the result is usually an even colour mix. So Martin and I, as much as possible, chose a supplier and individual colours that retained some of the imperfections so natural to medieval smalti.

Irregularly shaded 6th century smalti, Ravenna
Medieval tesserae also have more bubbles, many are slightly more translucent, and the gold tesserae are less flat, their cut less regular, and their gold leaf often fractured.
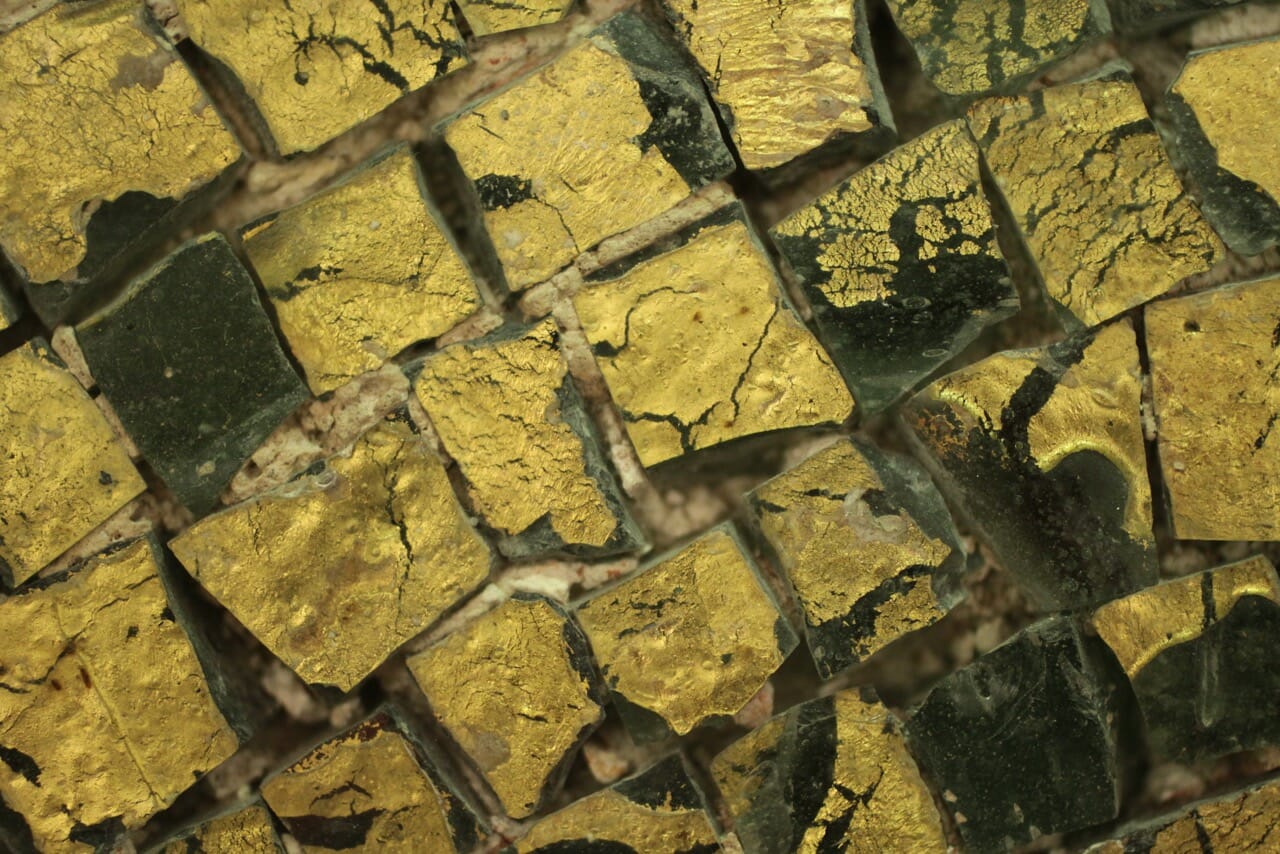
Perfectly imperfect 6th century gold tesserae, Ravenna
These are other factors that guide us in choosing the smalti, apart from colour.
- Don’t be afraid to delegate, but keep control of quality. Although we cut most tesserae ourselves, to save time with these large mosaics we ask our gold supplier, Donna Murano, to cut most of the background gold for us. Because the Murano cutters’ perception of a good cut is to be as close as possible to a perfect 10mm square, we have to give quite specific instructions how to cut them irregularly, contradictory as this seems! We want edge lengths to range between 7 and 13 mm, and send a sketch suggesting how this could be done without wasting any of the gold pizzas. It is ironic, but these days it requires effort and conscious choice to obtain the perfect imperfection that was so natural to past masters.
- Economy of cut. It ends up taking two of us about a year and a half to complete the mosaic, with help from various assistants now and then. We estimate around 500,000 tesserae were hand cut to make the two works. Most tesserae came in the “standard” cut of approximately 10 x 17mm, so each piece needed to be cut at least once. Making one unnecessary cut might take only five seconds, but multiply this by half a million and you get the picture – 560 wasted hours to be precise. But more importantly, fussy, over accurate cutting gives mosaic a mechanical feel.
A common solution was to design the mosaic for economy of line in the first place. Although there are masterpieces, such as the famous gallery deisis at Agia Sophia, that are very detailed and painterly, most medieval works are created with economy of line, with andamenta of fairly even width and not many triangles.So we design our elements, such as hair, with this in mind.
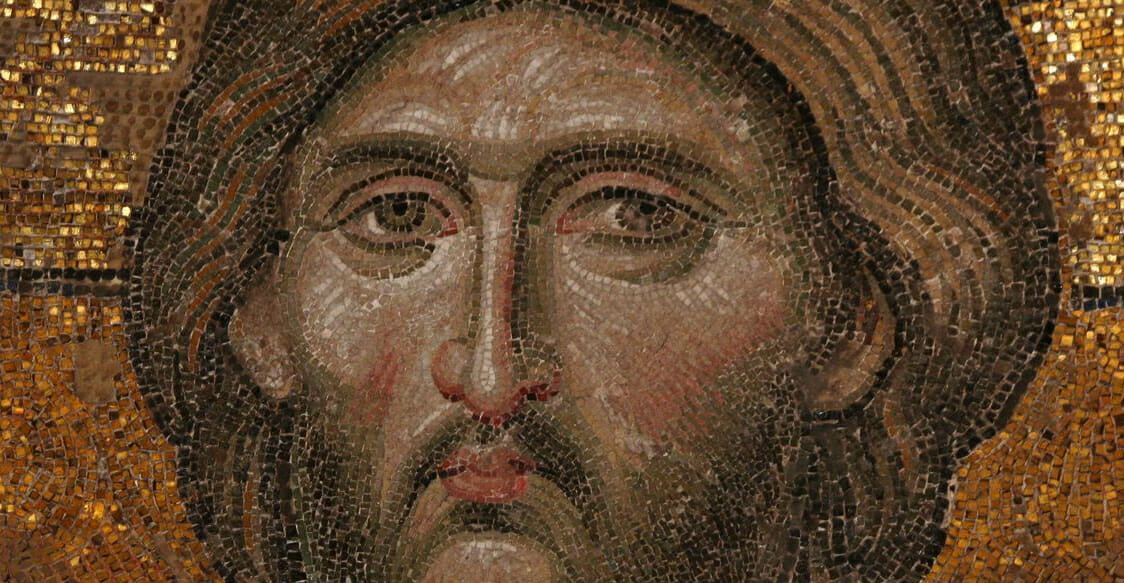
Deesis mosaic of Christ, 13th Century, Agia Sophia.
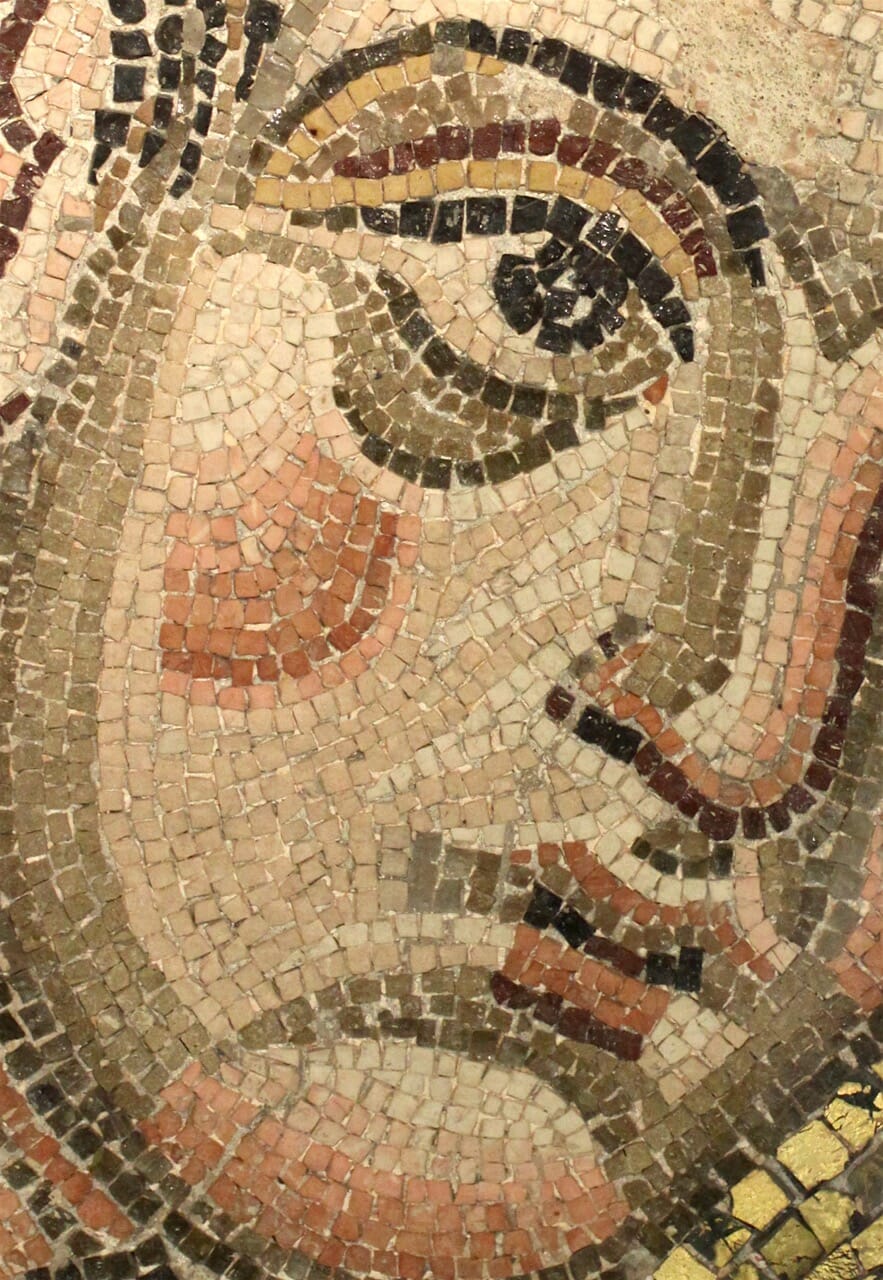
Mosaic of 6th century, Ravenna, showing economy of tesserae cutting.

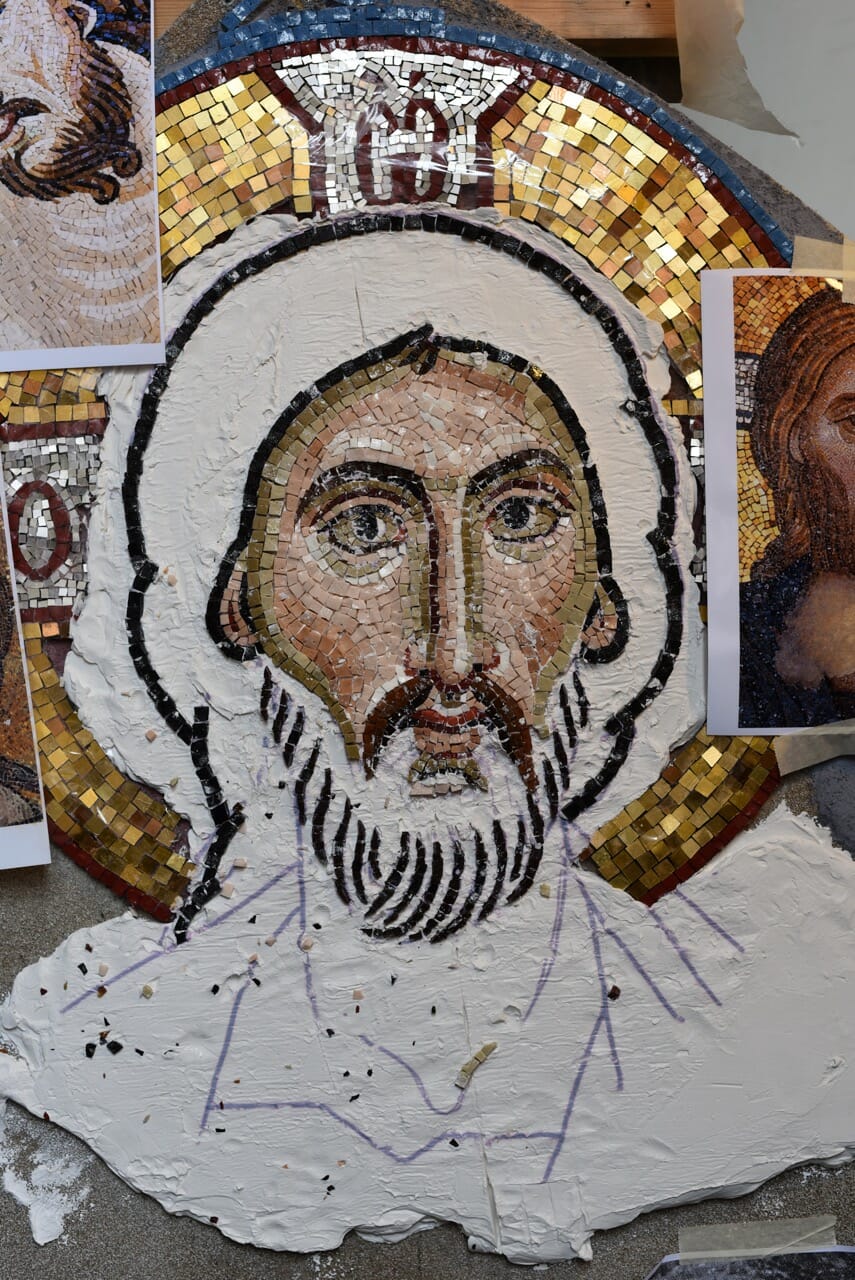
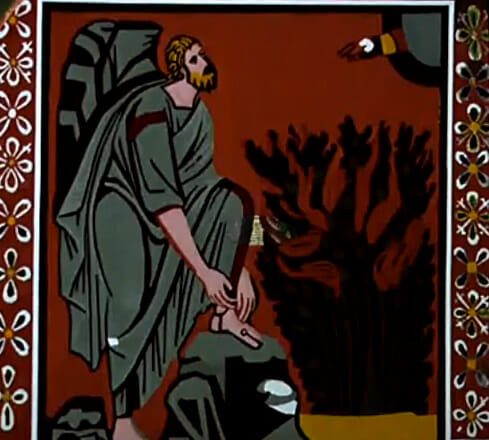
St John the Baptist. The hair lines are simplified to avoid the need for fussy cutting of tesserae.
- Keep triangular tesserae to a minimum, preserving them for essential areas. Triangles tend to attract attention, so they are best reserved for special treatments. My teacher, Luciana, repeatedly stressed this.

Triangular tesserae are kept to a minimum, preserved for the very tips of forms
- Respect the particularity of each individual tessera within andamenta, so that they dance together and not march like soldiers in regimented single file. In other words, don’t try to cut each tessera perfectly or place them exactly the same distance apart.
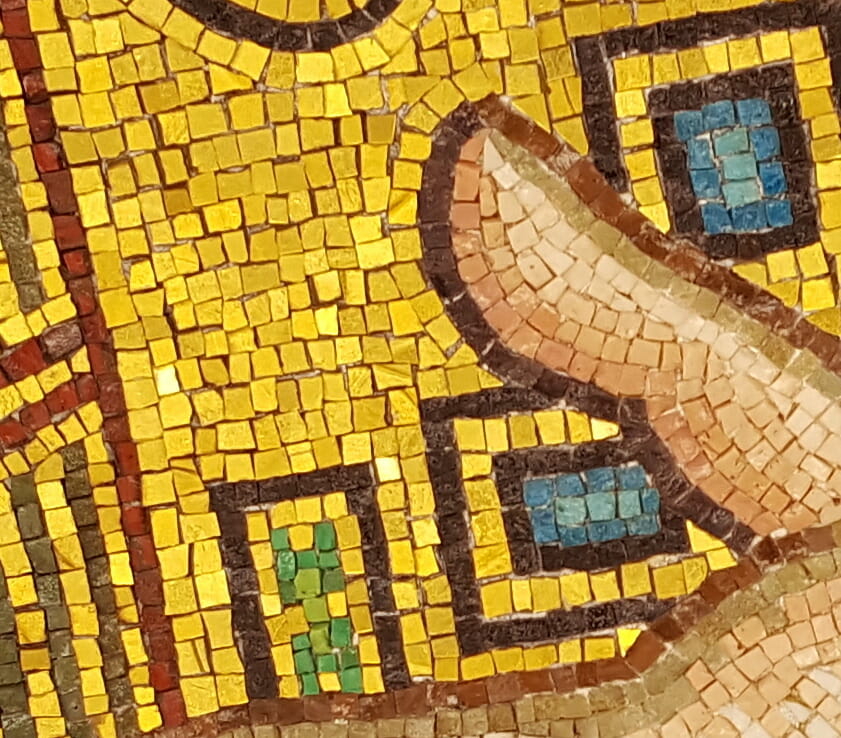
Although in lines, note how the gold tesserae are not regimented (1)
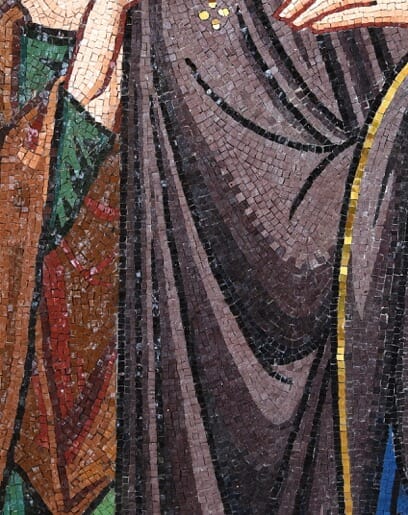
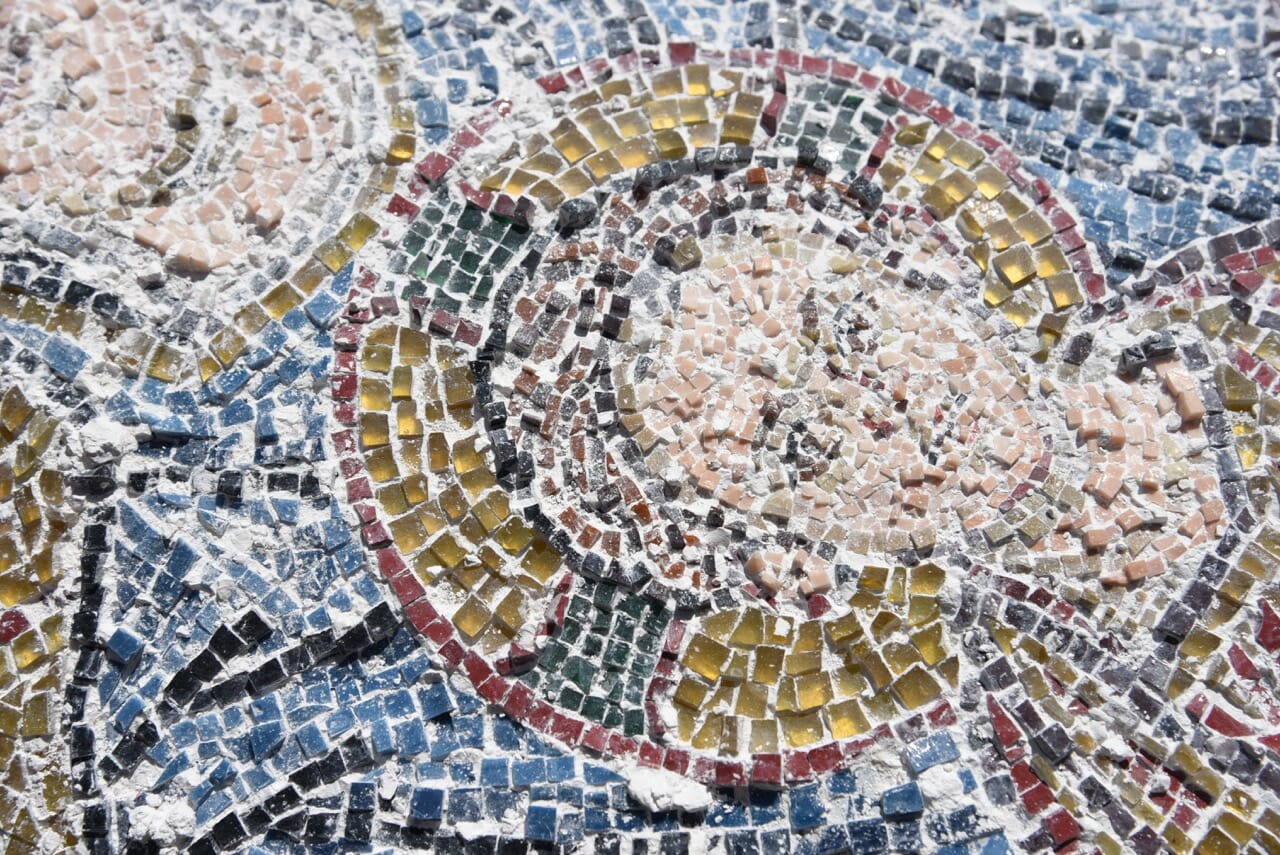
- Feel free to include surprising colours, especially in the garments. This creates vibrancy and depth. For example, we sometimes include blue shadows in red garments.
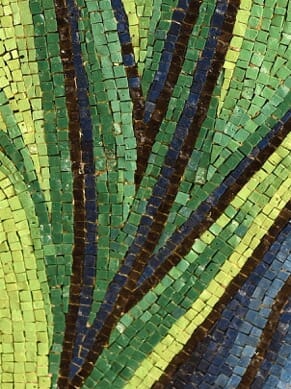
Note the inclusion of blue tesserae in the green.
- Use smaller tesserae for flesh parts than for garments and backgrounds. Our flesh tesserae measure around 7 x 7mm (0.3 x 0.3 inches) compared to an average of 10 x 10mm (0.4 x 0.4 inches) for the rest. This gives scope for more detailed and subtle expression, and also causes the viewer to focus more on the face and hands. Even “naturalistic” painters like Rembrandt often used the same technique. Compared to the face they left outlying details like garments and backgrounds much less worked, and even smudgy.

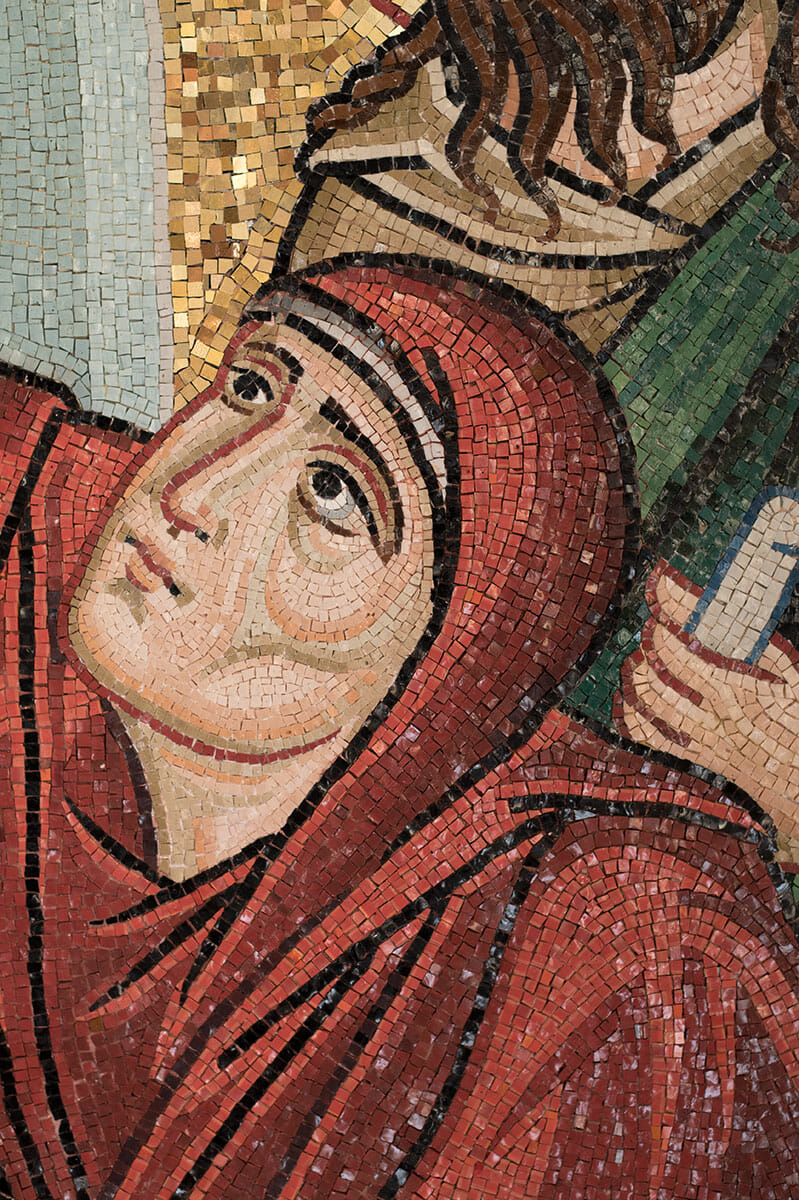
Mary Magdalene, showing smaller tesserae for the flesh areas.
- Choose an average size of tesserae appropriate to the distance that the mosaic will be viewed. Concurrently with the Houston works we made three other mosaics for a very small chapel. Because these were to be viewed close up we cut the tesserae much smaller, to an average of 5 x 5 mm (0.2 x 0.2 inches) for the backgrounds and garments, and a tiny 3 x 3 mm (0.12 x 0.12 inches) mm for the flesh areas.
Christ Pantocrator, private chapel.
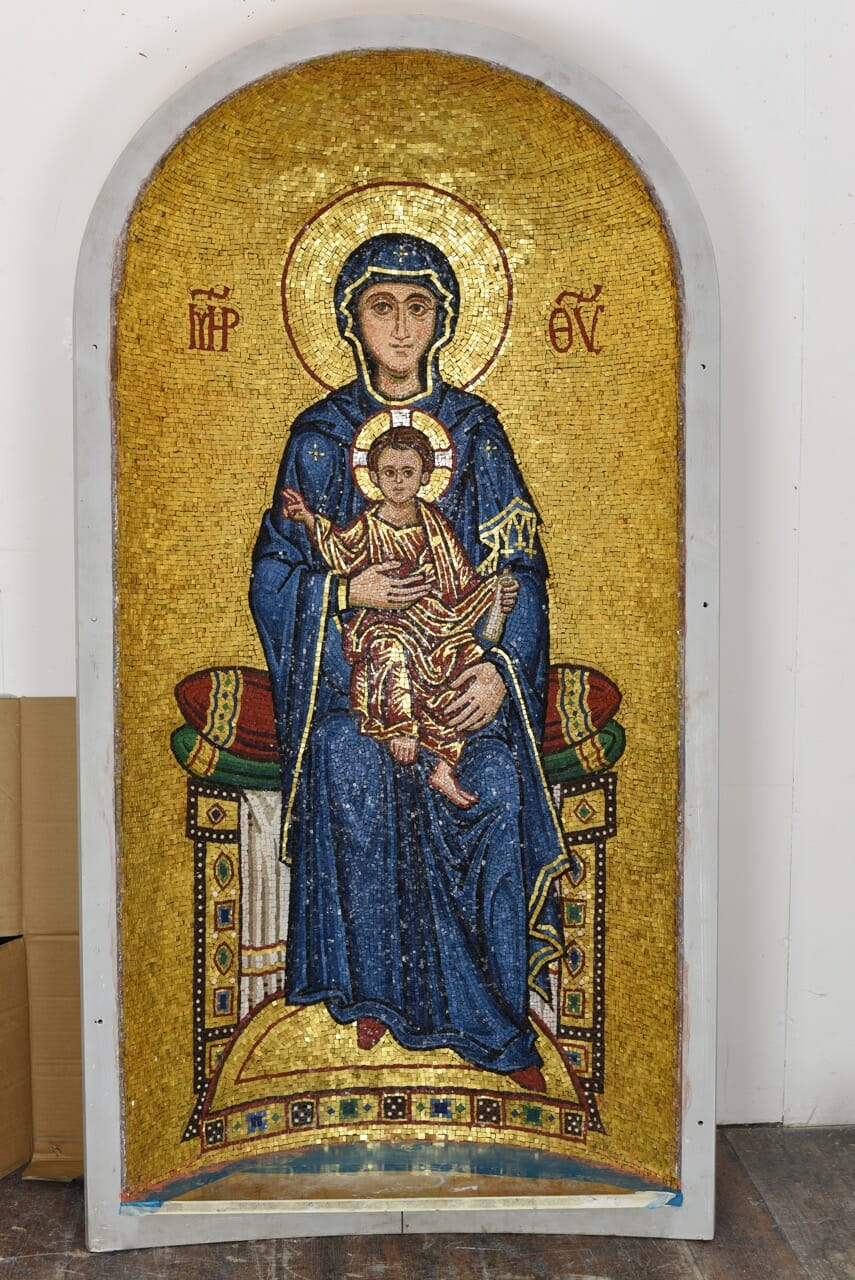
Virgin enthroned, private chapel.
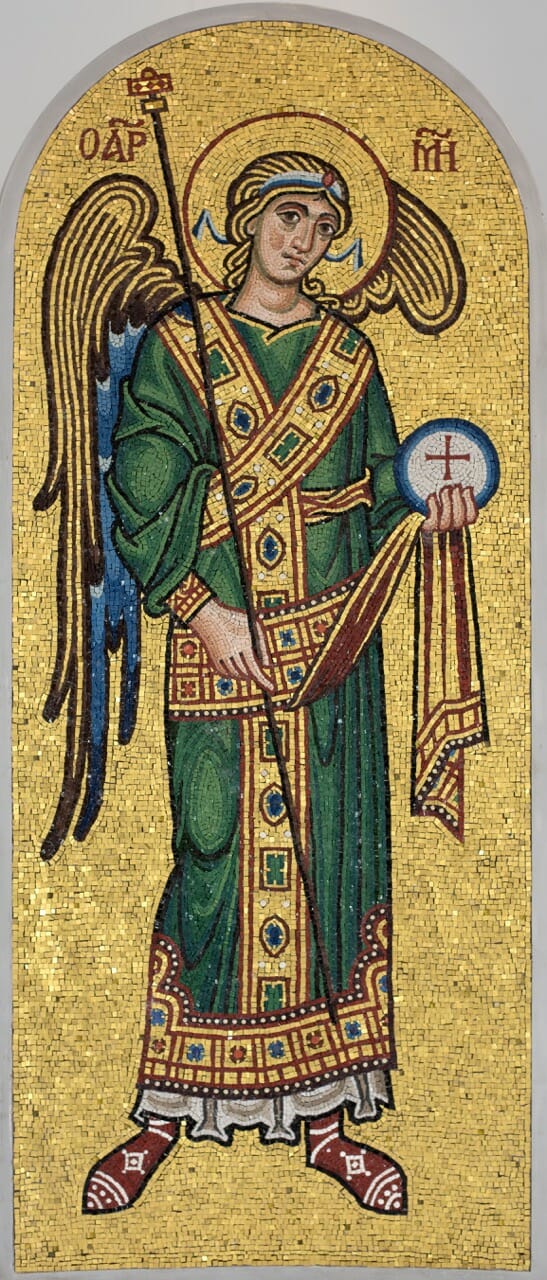
Archangel Michael, private chapel.
- Cut tesserae to generally the same size (though not identical) in each area, to give unity. Andamenta of haphazard width are distracting. These are an imperfect imperfection!
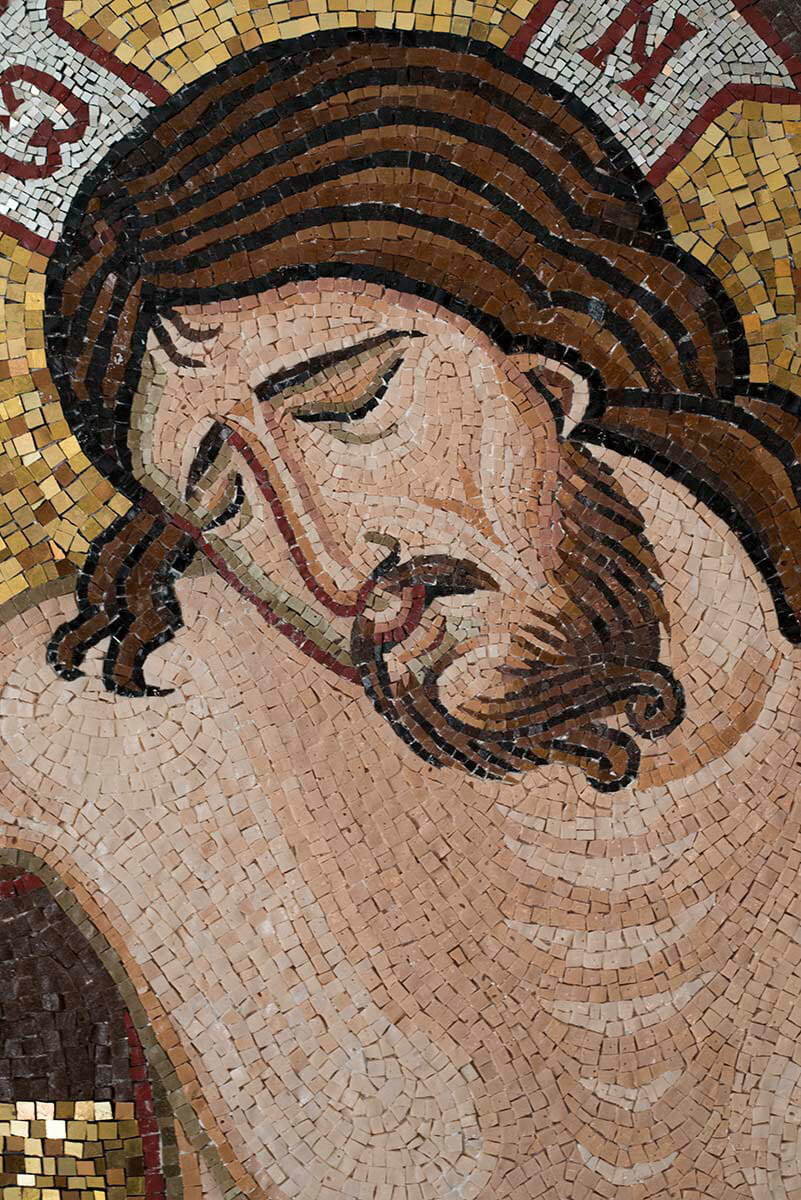
Christ crucified, showing consistancy of general tesserae size over a given area.
- Avoid trying to make slavish copies of paintings. If painted icons are to be used as a basis, they need to be adapted to the new medium. Mosaic is cruder than paint, so one needs to go for the bold statement, and distinguish the essential from the secondary. In particular, garment highlight shapes are usually much less in number in mosaics than in icons, and mosaics generally favour smooth curves over sharp changes of direction.
Drapery simplified for mosaic.
- Depend primarily on the power of the darker lines for expression, particularly for faces, hands and feet. These lines are what are first noticed at a distance. If they are weakly drawn, the most subtle modelling in the world will not save the mosaic from mediocrity.
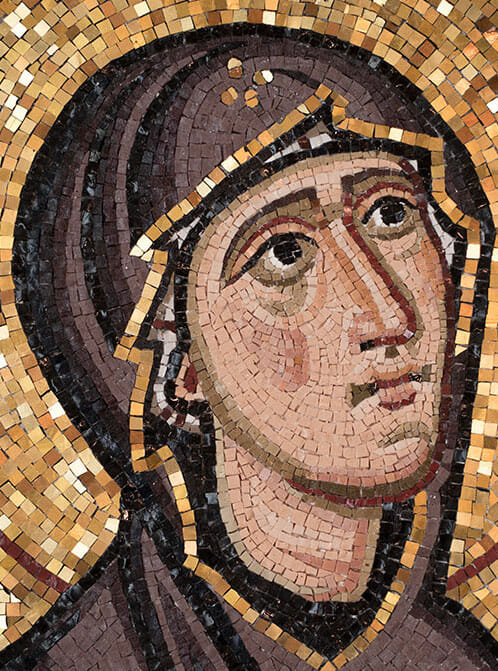
The Mother of God. Note how expression lies primarily with the strongly drawn lines.
- Before beginning to place the tesserae the mosaicist needs to have a very clear idea of his or her design. Every detail of proportion and expression should be triple checked before committing to mosaic. Mosaic is time consuming to change, as I was to learn!
The double direct method
The parish want to be able to move the mosaics if the church is ever reconfigured in the future, so we make the mosaics in sections in my studio, like a giant jigsaw puzzle. The panel shapes are carefully chosen so the joins coincide with transitions in the design, such as the outlines of figures and buildings.
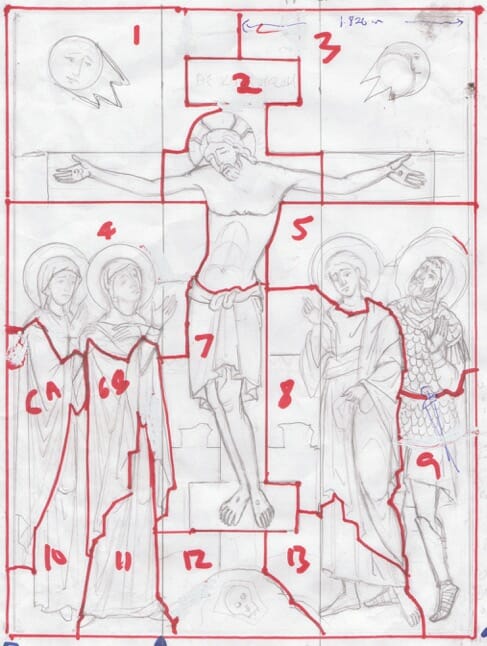
Panel joins.
The tesserae are to be fixed to a high tech composite panel, strong but light, variously called Cellite or Aerolam. This is a very light and rigid system used in the aircraft and aerospace industries, made of fibre reinforced epoxy resin panels sandwiching an aluminium honeycomb core.
With epoxy resin we glue a layer of coarse sand to the front surface of the panels in order to give the mosaic mortar a rough surface on which to key.
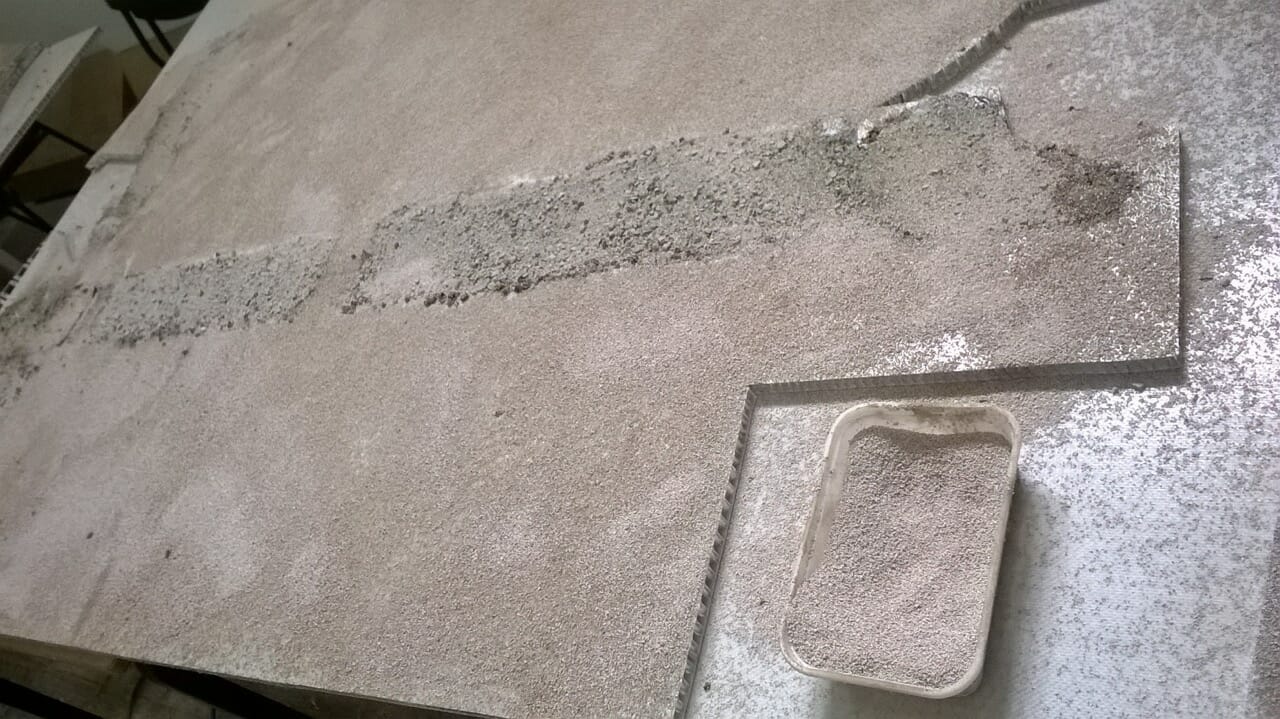
Sand is glued to the Aerolam sheets to provide a key.
For simpler areas of the mosaic, like gold backgrounds and buildings, we set the tesserae directly into the adhesive. We use a superior quality cement and lime based adhesive, Adesilex P10, made by Mapei. We add to it a plasticiser and fine fibre for extra durability.
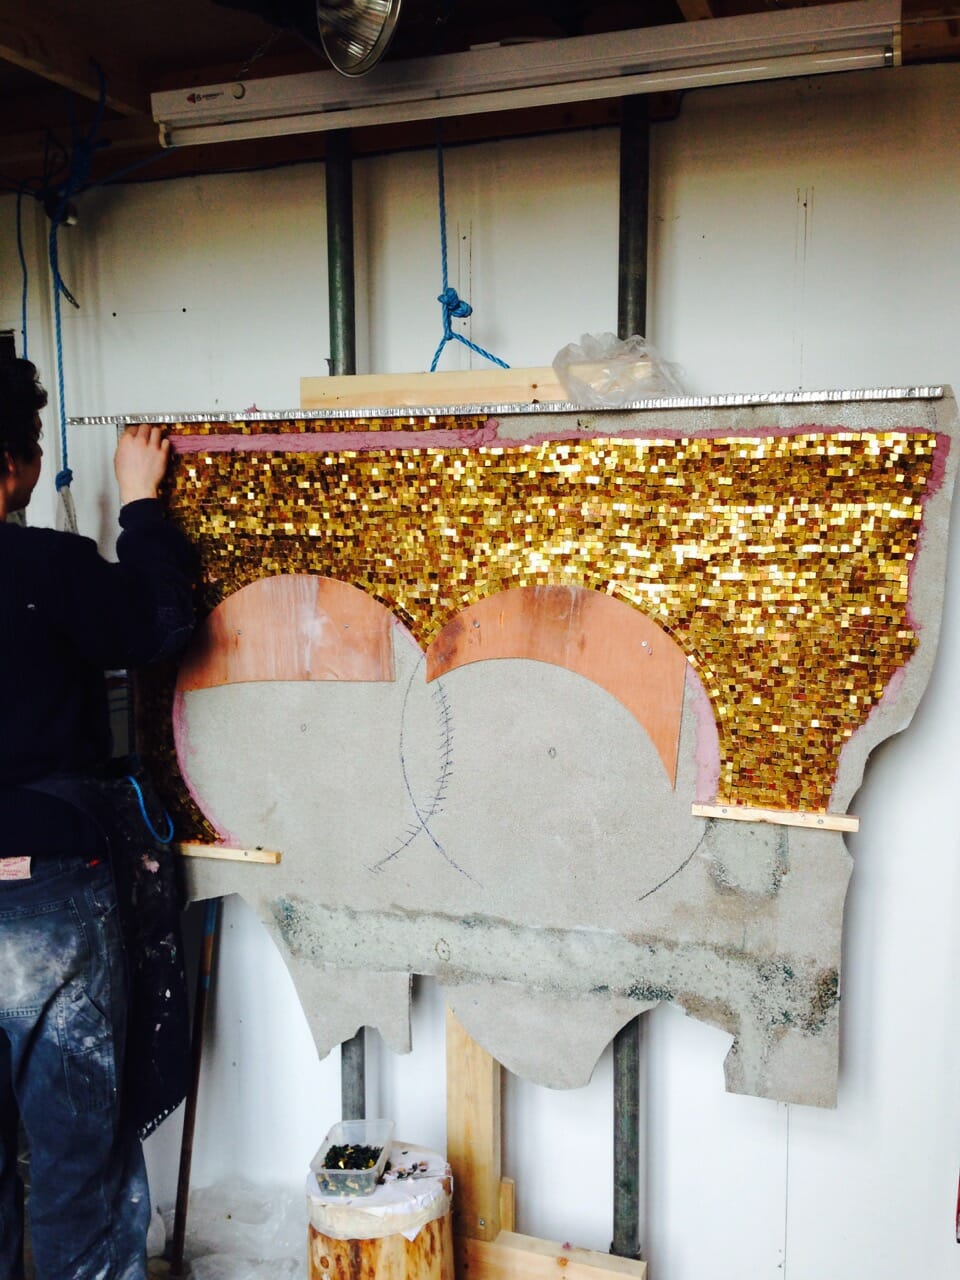
Applying tesserae directly to the mortar.
For more complex areas, like flesh and garments, we need more time to make adjustments than the Adesilex allows, so we use the ‘Ravenna Double Positive Method’ taught me by Luciana in Ravenna. This is the process:
- We spread lime putty about 25mm (one inch) thick onto an Aerolam panel. Kept moist and covered with plastic overnight, this lime has a workable time of up to three weeks, which gives us plenty of time to adjust the tesserae as we progress. This is particularly important in a face where every tessera contributes to the expression.
- We transfer our drawing onto the lime putty using glassine paper and a water soluble felt tip pen. We often trace the essential andamenta as well as the main features of the face or garment.

The double direct method, showing the temporary lime putty base, traced lines, and partially completed face.
- When all the tesserae for a panel are in place we then need to affix them permanently to the panel. Although lime is the traditional fixing mortar for mosaics, our panels will be moved around and therefore lime is unsuitable as a mortar due to its brittleness. We need to reattach the mosaic to the panel using the much stronger and flexible Adesilex. To do this we first glue a thin gauze to the surface of the mosaic using pearl glue, which is derived from animal tissue. This is water soluble and strong.
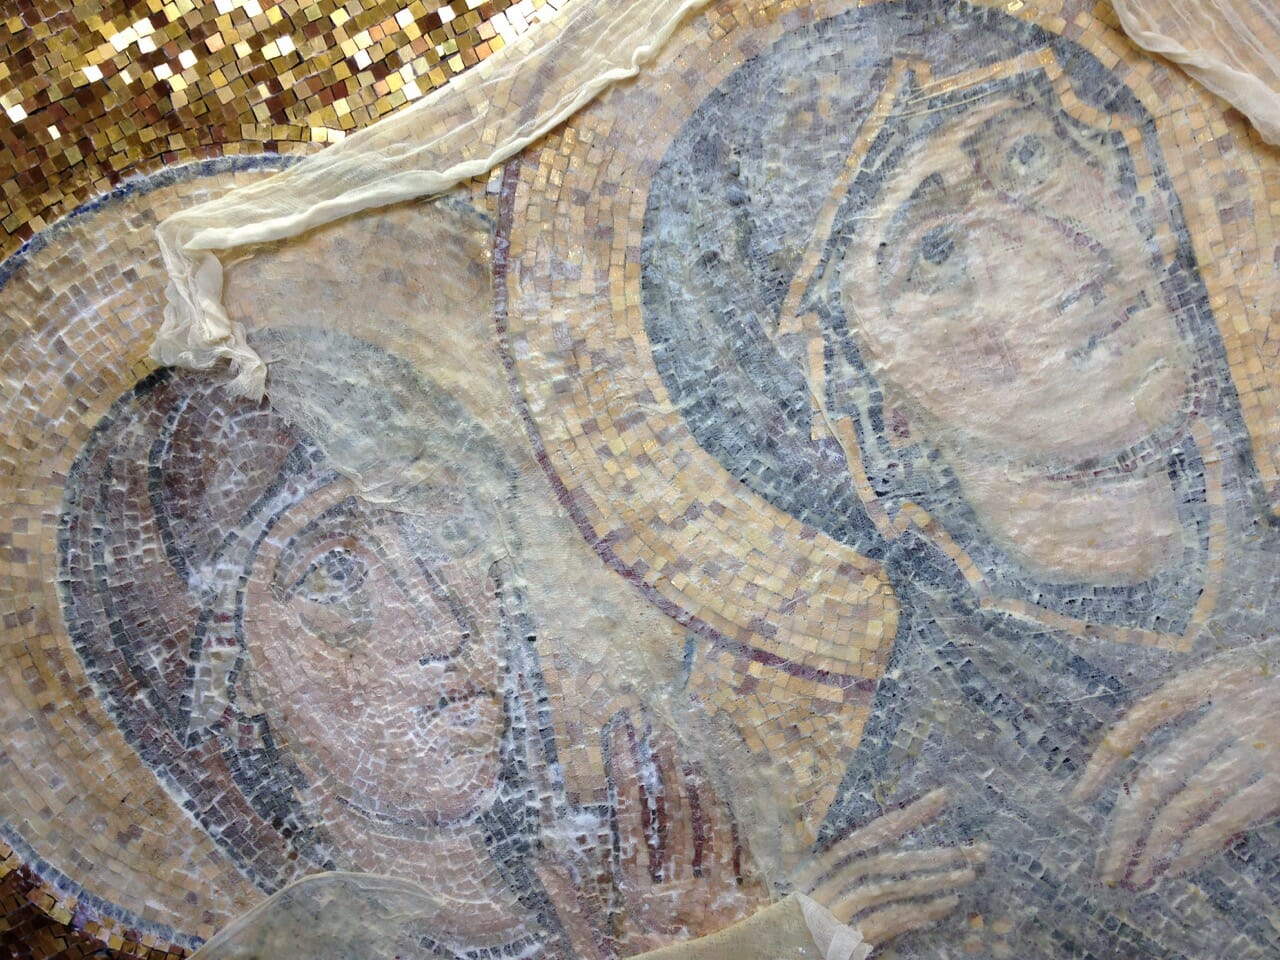
Cloth is glued onto the front using animal glue.
- After two or more days the glue is completely set. We hold our breath and lift the whole mosaic away from the Aerolam panel, every tessera hopefully still attached to the gauze. Using a pressure washer we then wash away any remaining lime putty from the panel and from the back of the tesserae, to reveal the reverse side of the mosaic. We purposely leave a little lime between the tesserae to help prevent the Adesilex from squeezing through to the front surface during the next stage.

The back of a mosaic before cleaning off the lime putty.
- There is evidence that Byzantine and Medieval mosaicists frescoed the basic forms and colours onto the lime plaster before setting in their tesserae. As well as providing the design, this fresco substrate had the added benefit of colouring any mortar that remained visible between the tesserae. We recreate this effect we tint the mortar suitably for each area – red for gold, blue for blue smalti and so on, and apply it the reverse side of the mosaic. A layer of plain mortar is also plastered onto the panel.

Fresco-base-for-mosaic.

Completed mosaic of Moses and the burning bush, St Catherine’s, Sinai, 6th century.
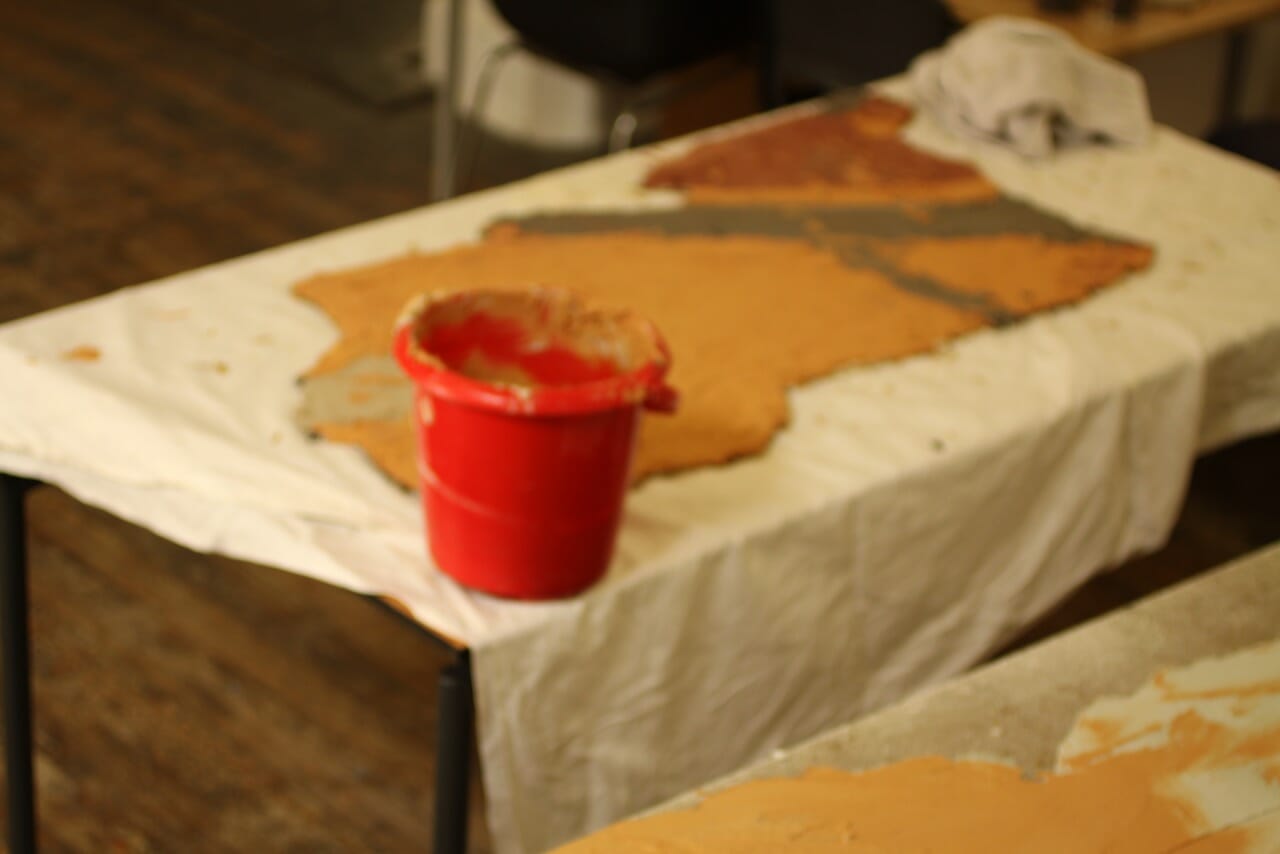
Application in sections of appropriately coloured mortar to the back of the mosaic.
- Working quickly before the mortar begins to stiffen and set, the mosaic is applied to the panel. We carefully press it down to ensure every tessera is attached, but not so hard that mortar is pressed right through to the front.
- We wait a couple of weeks to allow the mortar to set completely, then remove the gauze from the surface of the mosaic by pouring on hot water, which softens the pearl glue. We then scrub clean the surface.

The journey to Houston and installation
All the jigsaw puzzle pieces are completed, crated, and shipped by plane to Texas. Martin and I arrive in Houston on January 2nd, to spend a month of intensive work to attach the twenty-seven panels to the walls and fill in the gaps with tesserae.
We fix the panels using stainless steel screws and washers, screwed into large plastic Rawplugs in the concrete block wall. In the studio we deliberately left the areas around the edges free of tesserae, so now that all the panels are in place we can fill over the joins and make them invisible.
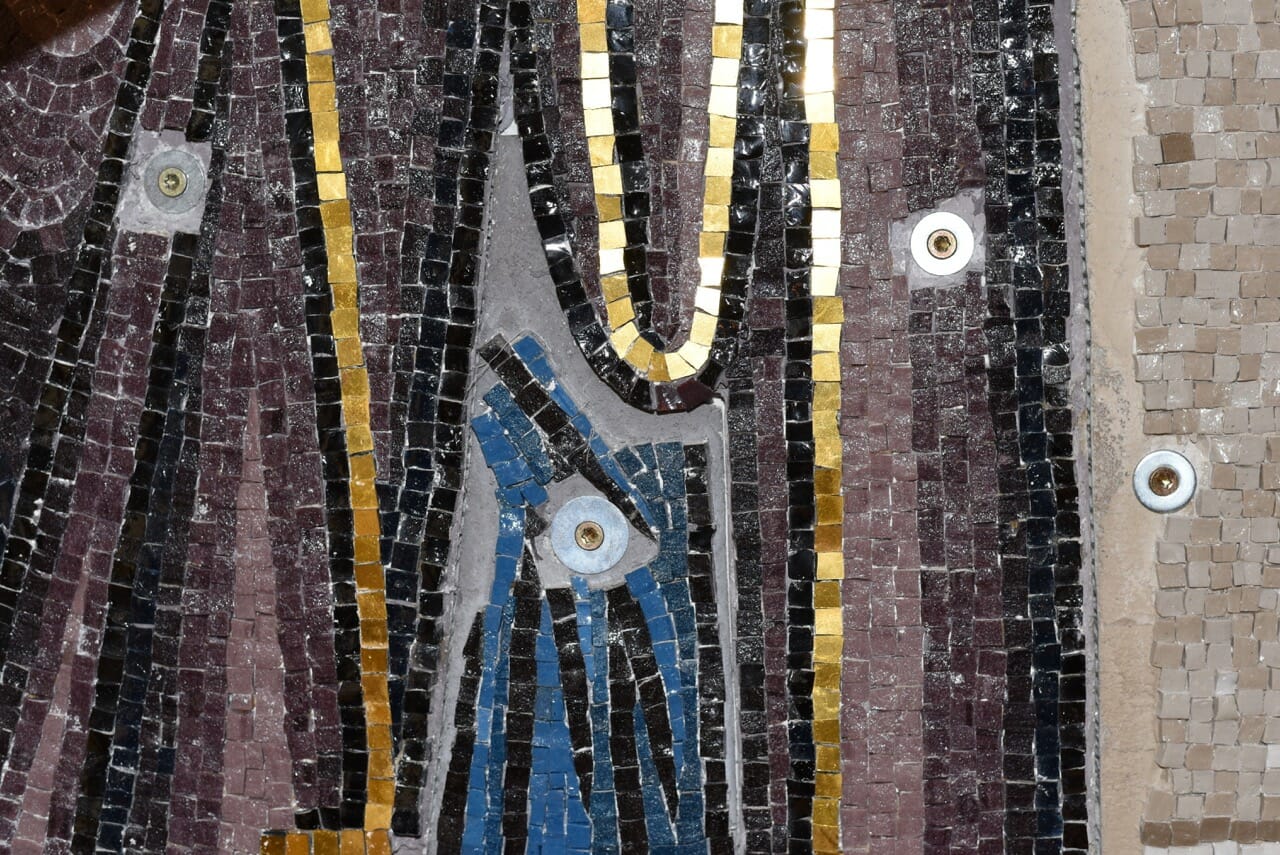
The panels screwed into the wall, the gaps waiting to be filled over with tesserae.
The work in Houston is very much a communal effort. Father James and his wonderful family give us splendid hospitality in their home; the parish provides great lunches to keep us going; we have the help of various budding mosaicists, including 14 year old Ada Germany from Philadelphia and Baker Galloway from Austin Texas; Octavia the secretary keeps things flowing smoothly, and even puts on an English high tea for us Brits; Alvera the handyman buys whatever extra tools or materials we need… the list goes on.
The liturgical garment is completed. The worshiping Body of Christ at St George’s parish is adorned with matter made radiant. Before the Holy Liturgy, wheat and grapes are transformed by human labour, and at the Liturgy these are offered to become the Body and Blood of Christ. Here, glass remains glass, but it becomes an image of the risen Christ. Through human love, glass sings the praises of God. “I tell you,” Christ said, “if these disciples of mine were silent, the very stones would cry out.” (Luke 19:40)
Absolutely magnificent!
Amazing. Absolutely amazing.
A fantastic effort and final result by two highly-skilled and dedicated craftsmen, along with a team in the background who support various steps in the process. I’m now even more appreciative of their other accomplishments which I’ve seen in their studio(s) and in churches.
Stunningly magnificent!
Thanks for sharing your work in such detail, the information is fascinating!
More wonderful work from Mr. Hart, and an enjoyable essay on the process!
Thank you for all your encouraging words. May these mosaics be a blessing for centuries to come!
Dear Aidan,
Glory to God! Beautiful icons. Very inspiring! The photos showing them in context look wonderful: real mosaic.
Thank you for the detailed explanation of the process and technique. We’ll be going through it carefully here in our Monastery workshop. It looks very useful, and answers several of the questions we had on the double direct technique. Your generously developed article is a real gift.
Many years and many mosaics to you and your co-workers!
Thank you Fr Patrick. Do ask if there are other technical questions you need clarifying.